To visualize the 3D coordinate system, I added code to display a gray pixel if the ray ever hit a point in space where two of the three (x, y, z) coordinates were integers. In the animation below, you may notice that the gray lines do not extend forever but rather end at a point at the back of the scene. This is because the animation environment is made of a finite space. Once a ray has traveled far enough without hitting anything, it is assumed it never will, and the pixel is set to black to create a black background. From Render #2, it is now clear that the camera is moving and the spheres are still.
Ray Tracing from Scratch in C++
Emet Behrendt • August 13, 2025

In the summer of 2023, having little knowledge of computer graphics, I set out to create a basic ray-tracing program from scratch in C++. Part of what attracted me to this project was knowing how computation-intensive ray tracing can be and that it would require efficient code to produce good results. In the name of learning for fun, I set out to create this program with minimal information on how modern ray tracing works, so I could challenge myself to figure it out.
The rendering program was written from scratch using only standard C/C++ libraries. I began by designing an environment that could contain cameras or scenery objects in 3D space. To generate animations, I rendered frames individually, either moving the camera or objects between frames. Individual frames were stored in 3-dimensional arrays. Two scripts (created by ChatGPT) were used to convert the 3D arrays to animated GIFs. The first script turned each C++ array into a BMP image to be saved to a drive. The second script turned all the BMP frames into a GIF using Python. A Makefile was used to compile the project and run the scripts.
To test my ray tracer, I began by creating an animation where a camera moves past two spheres, one in front of the other. The rendering began by casting an array for each pixel, then coloring the pixel based on what the ray hit. Render #1 demonstrates that the environment and animation work successfully.
Render #1: Testing the Environment
Render #2: Adding Gray Grid Lines
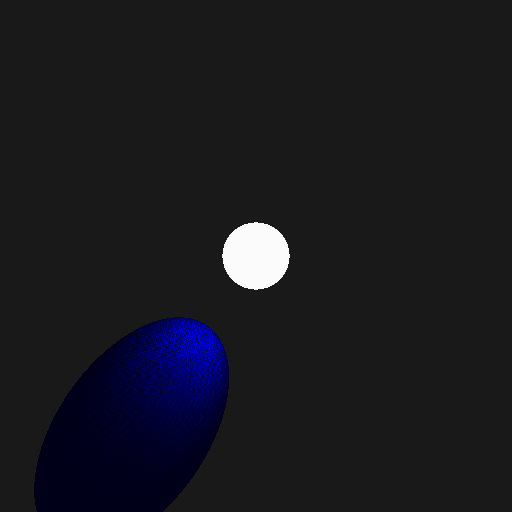
The next step was to add light sources. To begin, I added a parallel light field coming from the right side. The brightness of the light on the sphere was computed based on the cosine of the angle between the light field and the vector from the center of the sphere to the point where the ray hits. Render #3 shows an animation with the right side of each sphere being lit up.
Render #3: Adding Shadows
Ideal light sources are nice, but light-emitting objects would be even cooler. This would also allow us to create shadows in the future. I added an optional illumination property to spheres so a sphere could emit light. Adding a light source to my scene, I needed to modify how the ray tracing worked.
In real life, light emitted from a source reflects diffusely in many directions on most objects. To make computation easier, the path is instead traced backwards. If a ray coming from a camera hits an object, it reflects off that object diffusely in a random direction. If the reflected ray hits a light source, the pixel for the initial ray gets lit up. Render #4 shows the first attempt at using a light-emitting object.
Render #4: A Light Emitting Object
While Render #4 did light up the correct portion of the spheres, it only affected a fraction of the pixels giving a grainy effect. This is because the majority of the diffusely reflected rays were missing the light source. As the direction of reflection is random, averaging the effect of many reflected rays for each pixel gives a less grainy image. Averaging of the reflected ray was implemented for Render #5.

Render #5: Averaging Multiple Reflections
After averaging rays in Render #5, the lit areas were too dark, and the lighting strength needed to be increased. Render #6 shows the animation with a stronger light source.

Render #6: Increasing the Brightness
Render #6 was better, but even more rays were needed for smoothness. At this point, the program was starting to render too slowly, so I made several optimizations to increase its speed. One key optimization I made was in averaging the effect of reflected rays. The lighting effect of a reflected ray on a surface is proportional to the cosine of the angle from the normal. In my original design, each ray was reflected diffusely in a uniformly random direction, and the resulting effect was calculated with a cosine-weighted average. After some reading, I learned that I could instead take the unweighted average of rays that had been reflected with a random distribution proportional to the cosine of the angle from the normal. In other words, the chance a ray would reflect in a given direction is proportional to the effect that light from that direction would have. By concentrating rays in the direction that matters most, a similar result can be achieved with fewer rays, saving time during animation and creating a better picture. This article gives a more in-depth explanation of the optimization. Finally, in Render #7, the light-emitting object began working well.
Render #7: Cleaner Shadows
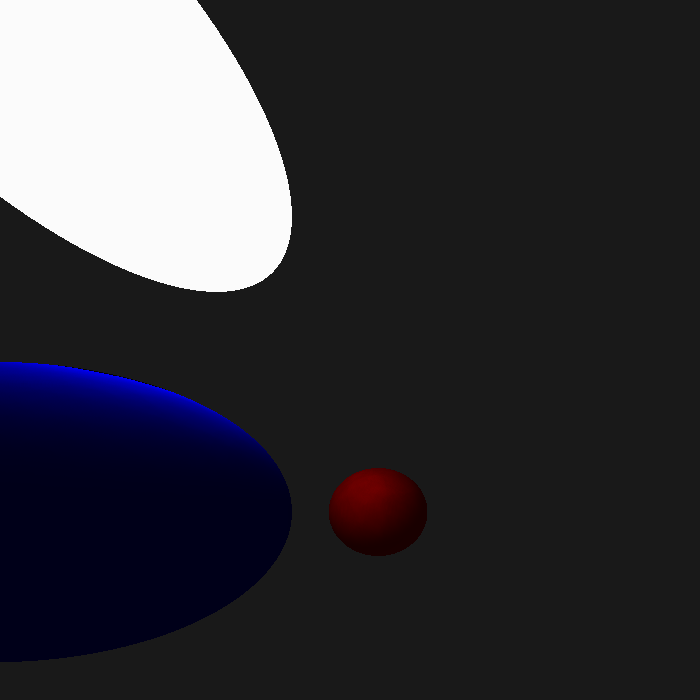
Render #7 looked good, so I decided to create a new animation to test my light source again. However, I soon noticed that the light source left an odd pattern on lit surfaces, as shown in Render #8.

Render #8: A New Animation
A still frame from Render #8 showing an odd lighting pattern on the blue sphere
I soon realized that the light patterns in Render #8 were an artifact of fast but poor-quality pseudo-random number generation. Similar patterns can be spotted when looking closely at Render #7. Poor quality random number generation means that the so-called "random" numbers actually have patterns! These patterns cause a skew in the distribution of diffuse reflection directions and result in pixels being brighter or darker than they should be. Fast yet good quality random number generation turns out to be a more complex problem than I initially thought but after making a new random number generator, the undesired lighting pattern disappeared.
One final render shows a high-resolution image demonstrating the success of the project.
A High-Resolution Render
Ultimately, creating a simple ray-tracing engine served its purpose as a fun way to learn about the computations fundamental to modern-day computer animation. It also served as a lesson on pseudo-random number generation and writing efficient C++ code. Perhaps in the future, I can try making a GPU-based shader for much better performance.